
Good pizza starts with the crust.
Start with homemade dough and give it time. Here you will find the original long-fermented recipes, a calculator for other schedules, and help with pizza styles, sauces and home-oven baking.
AI-generated illustration.
What would you like to do?
Good pizza starts with a plan.
At Sapidus, pizza starts with homemade dough and time to develop flavour. We mix the dough directly, without a preferment, use a little yeast and let it rise in the fridge. Get to know one dough, one shaping method and your oven before changing everything at once.
Here, we let the dough rise and mature over about two days, mostly in the fridge. Yeast produces gas and aroma compounds, while enzymes and time affect dough behaviour. Longer is not always better: excessive time or warmth can leave dough weak and difficult to shape.
The guide’s simpler basic dough is ready to try and has not yet been recorded as home-tested. The three-flour Master Dough is published separately as home-tested. These are different recipes. Neither is meant to reproduce every regional tradition.
Calculate your next pizza night.
Open Sapidus Pizza to calculate dough quantities, blend up to five flours and plan backwards from baking time. Choose dough-ball weights of 200, 250, 300 or 350 g, or enter your own weight. Master Dough with Nuvola, Cuoco and Manitoba Oro is included as a preset.
Choose 4, 8, 24, 48 or 72 hours of total proving time and see suggested Caputo flours. The app explains when very strong flour may be less suitable for a short rise, and when weaker flour may be less suitable for a long schedule.
Where can you buy the flour? Caputo Doppio Zero, Pizzeria, Nuvola, Cuoco and Manitoba Oro are listed in MENY’s range. This includes all three flours in our Master Dough. Selection and stock may vary by store; check your local MENY before shopping. Nuvola Super, also available as an option in the app, has not been confirmed as available at MENY.
Save doughs and notes on your device, and copy ingredients with a step-by-step method. Available in Norwegian and English.
Beta: fridge fixed at 4°C, selectable room temperature. Original recipe presets keep their fixed yeast ratios. A new time or room temperature creates a clearly labelled automatic estimate; you can also choose manual yeast. The model has not been kitchen-validated for every schedule, so follow the dough’s development.
Simple basic dough – 65% water, fixed recipe ratio.
Master Dough with three flours has its own home-tested recipe. The simpler 65% dough below is a separate original recipe for trying at home. Its fixed ratio is 3 g fresh or 1 g instant dry yeast per 600 g flour. The app’s Simple dough preset uses this same ratio and original schedule; automatic yeast is a separate, preliminary estimate.
The default makes about 1,007 g of dough: four balls of around 252 g for round pizzas about 28–30 cm wide. Choose pizza flour intended for a long rise, or strong wheat flour. Around 12–13% protein is a useful starting point; actual flour strength matters more than the “00” label alone.
65% hydration means 65 g water per 100 g flour. It is a manageable starting point, not a contest to add the most water. Use cool water and avoid overheating dough in a mixer. The basic dough contains no sugar or oil; home-oven adaptations follow below.
The yeast quantity is for the roughly 48-hour schedule with a fridge around 4°C and a room around 20–22°C. It is not a universal dose for both a day on the counter and three days in the fridge. Use instant yeast according to its manufacturer’s directions; other dry yeasts may need different handling.
Allergens: wheat/gluten in the dough. Cheese adds milk; other toppings may add further allergens. Long fermentation does not make ordinary wheat dough gluten-free.
Home-tested: Master Dough with three flours →
Original 65% recipe – fixed yeast ratio
This adjusts the amounts in the original recipe below. It keeps the yeast ratio fixed when you change the time or temperature. Choose Simple dough in the app for the same recipe ratio. Automatic mode makes a separate estimate.
| Ingredient | Amount | Baker’s percentage |
|---|---|---|
| Strong wheat flour / suitable pizza flour | 600 g | 100 % |
| Cool water | 390 g | 65 % |
| Fine salt | 16 g | 2.67 % |
| Instant dry yeast | 1 g | 0.17 % |
Makes 4 dough balls of about 252 g. Use 3 g fresh yeast instead of the dry yeast if preferred; do not use both.
Quantities scale; fermentation and baking times do not. Original schedule: 50 h 50 min proving + 40 min preparation = 51 h 30 min to the first bake. Weigh small yeast amounts precisely.
Original schedule – proving time and total time.
Example: the first pizza goes into the oven on Saturday at 19:00. Total proving time is 50 hours 50 minutes: 2 hours first rise + 46 hours in the fridge + 2 hours 50 minutes warming. Mixing, autolyse and kneading add 40 minutes, making 51 hours 30 minutes from starting to the first bake. Allow additional time for baking each pizza.
The Master Dough name “48H” refers to the first rise plus cold proof; warming and preparation are additional. The calculator’s 4/8/24/48/72-hour buttons always mean total proving time including warming. For example, 48 hours there means 2 hours first rise + 43 hours cold proof + 3 hours warming, plus preparation. This is a separate calculated schedule, not the unchanged original recipe.
At around 20–22°C, look for soft, airy dough that opens easily. The times guide you; the dough’s actual development determines when it is ready.
| Time | Activity |
|---|---|
| Thursday 15:30 | Mix flour and water |
| Thursday 15:35–15:55 | Autolyse |
| Thursday 15:55–16:10 | Add yeast and salt, then knead |
| Thursday 16:10–18:10 | First rise, covered |
| Thursday 18:10 | Divide, shape dough balls and refrigerate covered at around 4°C |
| Saturday 16:10 | Take the dough out of the fridge |
| Saturday 18:00–18:15 | Start preheating the oven and pizza steel |
| Saturday 19:00 | Shape and bake the pizzas |
Autolyse: flour and water only
Mix the flour with most of the water until all flour is moistened. Reserve a little of the measured water for the yeast. Cover and rest for 20 minutes without yeast or salt.
Knead and let rise
Add the yeast with the reserved water, add the salt and knead until smooth. Follow the yeast manufacturer’s directions. Cover and let rise for about two hours.
Shape balls before cold fermentation
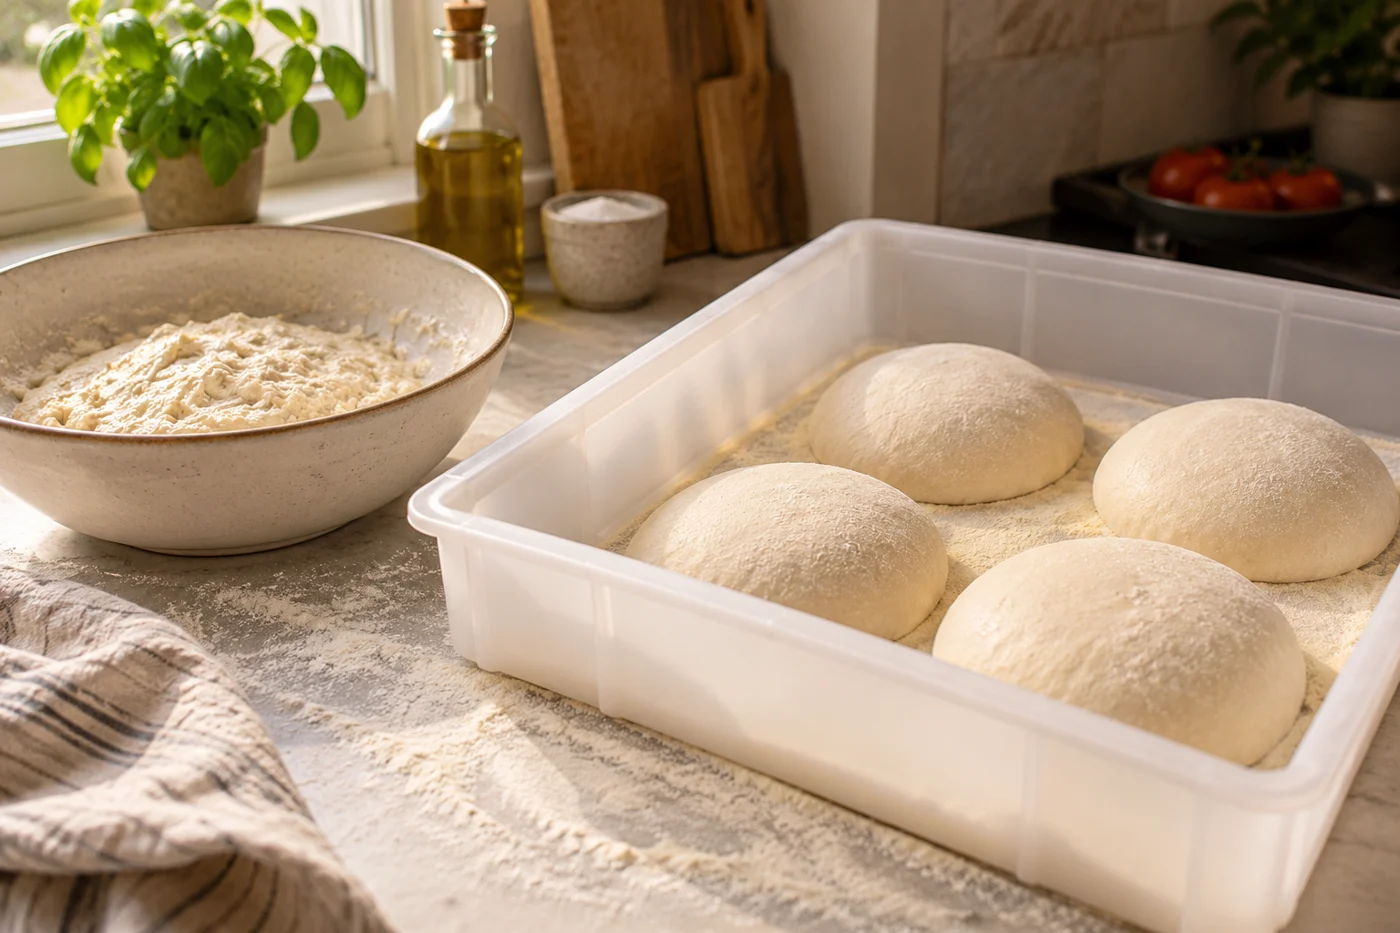
Divide into four equal pieces and shape smooth balls, seam-side down. Place in covered food containers with room to rise and refrigerate straight away.
Bring to room temperature, shape and bake
Take the containers out on Saturday at 16:10 and keep the dough covered. Preheat the oven and pizza steel for 45–60 minutes. Shape gently, top lightly and bake one pizza at a time.
Flour, yeast and temperature: control the dough.
00 is not the whole story
00 is an Italian flour classification, not a promise of strong gluten. Read the producer’s fermentation and usage guidance. Weak flour can break down during a long fermentation even if the bag says pizza flour.
Cold dough still ferments
Yeast slows in the fridge but does not necessarily stop. More yeast, warmer dough or a warmer fridge changes the schedule. Do not rely only on dramatic doubling in a cold container to judge development.
24 and 72 hours need adjustment
Use 48 hours for your first test. A shorter schedule may need more yeast or more time outside the fridge; a longer one often needs less yeast or a shorter warm phase. Change one variable and record the result.
Poolish, biga and sourdough
Poolish is a wet preferment, biga a firmer one, while sourdough is a culture containing yeast and lactic acid bacteria. All can make pizza, but need their own quantities and schedules. Direct cold-fermented dough is a good starting point.
Keep the air where you want the rim.
Lightly dust the worktop with flour or fine semolina. Press from the centre outward, leaving the outer centimetre untouched for an airy rim. Lift over your knuckles and let gravity help stretch. Stop before the centre becomes transparent and tears.
If the dough springs back, cover it and rest for 15–20 minutes. More force or lots of extra flour rarely helps. For Roman thin-crust or tavern-inspired pizza, a rolling pin can help you get an even, flat, crisp base. It is less suitable for a tall, airy Neapolitan-style rim.
Use little dusting flour on the peel and check that the base slides before finishing the toppings. Work quickly: sauce and warm hands can make a thin base wet. Brush away excess flour between bakes so it does not burn.
Match the pizza to your oven.
A domestic oven at 250–300°C bakes differently from a pizza oven above 400°C. Even with the same dough and toppings, the results will differ. Home ovens are especially useful for crisp round pizzas and pan pizzas.
Start with conventional top-and-bottom heat. Preheat a stone or steel for about 45–60 minutes, or as its maker directs. Position depends on your oven: start around the middle and adjust according to whether the base or top needs more heat. Use equipment rated for the temperature.
Domestic oven – 250–300°C: Preheat the pizza steel for 45–60 minutes. Bake for about 5–8 minutes, depending on the oven. If needed, finish briefly under the grill and watch closely.
| Method | Starting point | Look for |
|---|---|---|
| Round pizza on steel or stone | 250–300°C, about 5–8 minutes | A cooked, coloured base and melted cheese; thinner pizza and hotter steel bake faster. |
| On a regular baking tray | 250–275°C, often 8–15 minutes | Preheat a sturdy tray if suitable; check that the underside does not remain pale. |
| Pizza in an oiled pan | 230–250°C, often 15–25 minutes | Golden underside and cooked centre. Thickness and pan material change the time. |
| Neapolitan pizza in a very hot pizza oven | About 430–480°C, traditionally 60–90 seconds | Soft, thin centre and inflated rim with dark spots. Rotate as the oven heat requires. |
Pizza toppings – less is more
For four round pizzas, start with one 400 g tin of good tomatoes. Crush or briefly blend and season with roughly 3–4 g fine salt, depending on the tomatoes. Use only what you need: around 60–80 g sauce per pizza is a practical starting point; save the rest for another dish. Sugar is not automatically necessary.
Drain fresh mozzarella and pat lightly dry. Around 70–100 g per pizza is a starting point. Lower-moisture pizza mozzarella suits longer home-oven bakes; fresh mozzarella gives a different, juicier result. A little Parmesan can add flavour without a heavy cheese layer.
Pre-cook raw mince, raw chicken and other toppings needing thorough cooking. Brown mushrooms to release water. Slice onions thinly. Cured ham, rocket and delicate herbs can go on after baking. Let a few good ingredients stand out rather than piling on a wet mountain.
Choose toppings in Sapidus Pizza ↗
Margherita and Marinara
Margherita refers to tomato, mozzarella and basil. Marinara usually has tomato, garlic, oregano and oil, without cheese. These names describe toppings; they do not by themselves specify how the base is made.
Bianca, Diavola and Quattro Formaggi
Bianca usually means no tomato sauce, but Roman pizza bianca can be plain bread with oil and salt. Diavola suggests spicy salami; Quattro Formaggi is a cheese combination. Quattro Stagioni arranges toppings in four sections.
Less is more – give the pizza a clear identity
Decide what you want the pizza to taste of most. Choose something that goes with that main flavour, and add something fresh at the end if you like. Mushrooms can have mozzarella and a little Parmesan. Prosciutto can have rocket. Pear can have blue cheese. They do not all need chilli, honey, pesto and balsamic glaze at once.
The Sapidus working rule is 2–4 toppings beyond sauce and a simple base cheese. This is a starting point, not an Italian law. With fewer ingredients, you can taste each one more clearly, adjust the salt and work out what went wrong. A deliberate cheese combination is different from emptying the fridge.
Look at the pizza before baking: can you still see sauce between the pieces? Is the centre lightly covered? Spread toppings across the surface rather than piling them in the middle. A thin round pizza supports less weight than a thick pan pizza. What works on a Detroit-style pizza need not suit a base that bakes quickly.
Quantities: start lightly and adjust after the first pizza
The quantities below are practical Sapidus starting suggestions for a thin round pizza roughly 28–32 cm across. Diameter, dough-ball weight, thickness, ingredients and oven all affect the amount needed. Do not combine every upper limit. If you add a strong cheese or salty topping, reduce other salty ingredients.
The app scales topping quantities by dough-ball weight. This is a practical simplification: doubling the weight does not necessarily double the topping surface. Treat the numbers as starting points and judge coverage. Dough-ball weight means dough alone, excluding toppings.
| Component | Starting amount | How to judge |
|---|---|---|
| Red tomato sauce | 60–80 g | A thin layer; do not leave the base in a puddle. |
| White crème fraîche base | 30–40 g | Spread thinly. Even a thick sauce can weigh the pizza down. |
| Mozzarella | 70–100 g | Use the lower end when adding other cheeses. |
| Cooked ham or fully cooked chicken | 30–45 g | Spread small pieces in a loose single layer. |
| Mushrooms, sautéed | 30–45 g | Weight after cooking and draining. |
| Gorgonzola or another strong cheese | 15–25 g | Replace some base cheese; not always an extra. |
| Prosciutto | 20–30 g | Thin slices, preferably after baking. |
| Honey | 3–5 g | A small finishing touch when sweetness is needed. |
Moisture: juicy toppings can make a soggy base
Think about how much liquid the toppings will release together. A little tomato sauce, fresh mozzarella and sliced tomato can each work individually; large amounts of all three can leave a wet centre. Baking longer does not always fix it before the rim becomes too dark.
Drain mozzarella. Tear it into smaller pieces and gently pat the surface dry. Drain tinned ingredients well. Sauté mushrooms in an uncrowded pan until their liquid evaporates; cool before topping. Consider pre-cooking courgette, aubergine and chunky onion. Thin onion or pepper strips can be used raw when quantities and baking time suit them.
Avoid large wet vegetable pieces on a pizza that will bake briefly. Cool hot pre-cooked toppings before placing them on the dough. Prepare everything, top the pizza when the oven is ready and bake immediately. Do not leave a topped raw pizza soaking on the peel.
Before or after baking? Let the ingredient decide
Some ingredients need oven heat to melt or brown. Others lose freshness or dry out. Finishing toppings are part of the recipe, not merely decoration. Add them to the baked pizza while it is still warm.
| Ingredient | When | Why / preparation |
|---|---|---|
| Mozzarella, ricotta, gorgonzola | Before | Distribute small amounts so the cheese melts evenly. |
| Mushrooms and caramelised onion | Before | Cook first, cool and add without pan liquid. |
| Chicken and mince | Fully cooked before topping | Do not rely on a short pizza bake as the only cooking step for raw meat. |
| Pepperoni and cooked ham | Usually before | Pepperoni browns; avoid thick layers. |
| Prosciutto | Preferably after | Keeps its soft texture; baking can dry it and concentrate saltiness. |
| Rocket and delicate herbs | Preferably after | Preserves freshness. Basil before baking is also traditional, but can scorch. |
| Parmesan | Before or after | Before for melting, after for more distinct aroma. |
| Honey and finely grated lemon zest | After | Use a little and taste before adding more. |
Make the sauce, cheese and toppings work together
Choose the sauce for the flavour you want to emphasise. Red sauce gives a tomato-led, acidic base. A white crème fraîche base is creamy and also acidic; white does not mean flavourless. Pizza bianca does not always need cream or crème fraîche either.
Think about how much salt all the toppings add up to. Prosciutto, Parmesan, olives, anchovies and blue cheese can each contribute plenty. Let one provide most of the flavour, and taste before adding another. Chilli should provide warmth without drowning the ingredients. Honey can contrast with salty cheese, but should not form a blanket that conceals everything else.
Try these combinations: tomato, mozzarella and basil; white base, sautéed mushrooms and Parmesan; tomato, mozzarella and prosciutto with rocket after baking; white base, a little gorgonzola and pear with walnuts after baking. Fig, ricotta and prosciutto is another familiar sweet-and-salty combination. These suggestions are not automatically recorded as home-tested at Sapidus.
Do this
Choose one leading flavour. Use small pieces, thin layers and drained toppings. Taste the finished combination before adding extra salt, chilli or sweetness.
Avoid this
Do not put every strong or salty favourite on one pizza. Do not increase sauce, cheese and toppings together to get more flavour. Do not bury good ingredients under a thick cheese lid.
Which flavours go together?
We would not start with peppermint and peanut butter on a savoury pizza. The cooling herb flavour and heavy nuttiness can clash. This is a taste judgement, not a dangerous chemical reaction. Peanuts and mint working in other dishes does not make every pizza containing them balanced.
Anchovies and gorgonzola together can become too salty and dominant. Two generous sweet components, such as lots of honey and sweet chutney, can move the pizza towards dessert. Strong chilli, smoked meat and plenty of blue cheese can make individual ingredients hard to distinguish. Smaller amounts or fewer ingredients are often the answer.
Pineapple, fruit and unconventional sauces are not automatically wrong. Ask instead: do the flavours and textures work together? Is there a balance of sweetness, salt, acidity and fat? Test a small pizza first. Change one thing at a time and note what you actually used.
When toppings do not work – find the cause
Before changing the dough recipe, look at what you put on top. A pizza with a good rim and wet centre may have a topping problem. Compare it with a simpler pizza baked using the same dough and oven.
| Problem | Possible cause | Next attempt |
|---|---|---|
| Wet or floppy centre | Too much sauce or wet ingredients; weak bottom heat is also possible | Use fewer wet toppings and check that the baking surface is well preheated. |
| Pools of fat on top | Plenty of fatty cheese and fatty cured sausage together | Reduce one of them; avoid dense layering. |
| Everything tastes salty | Several salty toppings plus salted sauce | Use fewer salty ingredients and allow for them when seasoning the sauce. |
| Bitter or burnt finish | Herbs, garlic or sweet toppings exposed to intense heat | Move delicate ingredients to after baking, or protect them and use less. |
| Raw chunky vegetables | Pieces too large for the short baking time | Slice thinner or pre-cook. |
| No clear leading flavour | Too many competing ingredients | Remove two toppings before adding anything new. |
Try it: the same dough with half the topping
Make two matching pizzas with the same sauce, cheese and main topping. On the second, use roughly half as much of the main topping; keep everything else the same. Compare crispness, heaviness, salt and how clearly each ingredient stands out. This is a suggested home experiment, not a documented Sapidus test result.
Finish with three questions: can I taste the base? Can I name the leading flavour? Would removing one thing improve it? Less is more means every ingredient has a job.
Three red sauces: fresh, rich or spicy.
Choose the sauce to suit the toppings and oven. Each batch is intended for several round pizzas of about 28–30 cm; the amount you use matters more than using up the whole batch. Start with a thin layer and leave the rim bare. These are Sapidus recipes for trying at home, not yet recorded as home-tested.
Red 1: Simple uncooked tomato sauce
Open recipe and adjust quantity →
About 400 g · 5–6 pizzas · 5 minutes
Ingredients
- 400 g canned whole plum tomatoes, including their juice
- 3 g fine salt, adjust to taste
- 4–6 basil leaves, torn by hand (optional)
Method
- Crush the tomatoes by hand or with a fork. Alternatively, pulse very briefly with a hand blender; the sauce need not be completely smooth.
- Stir in the salt and optional basil. If the tomatoes are very watery, drain off a little liquid before mixing.
- Spread 60–80 g thinly over each 28–30 cm base. The sauce cooks as the pizza bakes.
Pairs well with: Margherita, fresh mozzarella and basil. A useful starting point for a short bake in a hot pizza oven.
Let the tomatoes provide most of the flavour. Olive oil can be drizzled onto the pizza separately; garlic, oregano and sugar are optional rather than essential.
Red 2: Cooked tomato sauce with garlic and oregano
Open recipe and adjust quantity →
About 320–350 g · 4–5 pizzas · 25–35 minutes
Ingredients
- 400 g passata or crushed canned tomatoes
- 10 g olive oil
- 1 small garlic clove, finely chopped
- ½ tsp dried oregano
- 3 g fine salt, adjust after reducing
- ¼ tsp sugar, only if needed
Method
- Warm the oil over a medium-low heat. Cook the garlic until fragrant, 30–60 seconds, without browning.
- Add the tomatoes and oregano. Simmer uncovered for 20–30 minutes until spreadable, leaving a visible trail when drawn through with a spoon.
- Season with salt after reducing. Try a little sugar only if the tomatoes need rounding out. Cool before spreading onto the dough.
Pairs well with: Crisp home-oven pizza, Norwegian tray pizza, ham, mushrooms and minced meat. Use 60–80 g per round pizza.
Cooking evaporates water and makes a fuller sauce. Sugar rounds out the flavour but does not remove the acid.
Red 3: Spicy tomato sauce with pul biber
Open recipe and adjust quantity →
About 330–360 g · 4–5 pizzas · 20–30 minutes
Ingredients
- 400 g crushed canned tomatoes
- 10 g olive oil
- 1 small garlic clove, finely chopped
- 10 g tomato purée (concentrated tomato paste)
- ½–1 tsp mild pul biber, start cautiously
- ½ tsp dried oregano
- 2 g fine salt, adjust after reducing
Method
- Gently soften the garlic in the oil. Stir in the tomato purée and cook for about a minute without scorching.
- Add the tomatoes, oregano and initially ½ tsp pul biber. Simmer uncovered for 15–20 minutes.
- Adjust the chilli and salt. Cool before use; spread 60–80 g over each pizza.
Pairs well with: Diavola-inspired pizza with spicy salami, peppers and red onion. Also good with sautéed mushrooms.
This is a Sapidus variation. Pul biber varies in heat and may contain salt; spicy salami and cheese also contribute salt.
Three white sauces: tangy, fresh or creamy.
White pizza has no tomato sauce; it does not necessarily need a creamy sauce. These three bases are alternatives to tomato, and all contain milk. Use less sauce and cheese than you might expect: white bases are rich. Cool cooked sauces before putting them on the dough.
White 1: Crème fraîche with garlic
Open recipe and adjust quantity →
About 210 g · 4 pizzas · 5 minutes
Ingredients
- 200 g crème fraîche, preferably about 35% fat
- 1 small garlic clove, finely grated
- 5 g olive oil
- 1 g fine salt
- 2–3 grinds of black pepper
- ½ tsp finely chopped thyme (optional)
Method
- Stir everything together until smooth. Check the seasoning, especially if the toppings are salty.
- Spread about 40–50 g thinly over each base. Avoid large, thick dollops.
- Top and bake as usual. Add delicate herbs after baking if you prefer a fresher flavour.
Pairs well with: Sautéed mushrooms, thinly sliced potatoes, bacon, onions or fully cooked chicken.
Allergen: milk. This sauce is tangy and rich. Crème fraîche gives the consistency we want here; low-fat yoghurt will not give the same result.
White 2: Ricotta, Parmesan and lemon
Open recipe and adjust quantity →
About 280 g · 5–6 pizzas · 10 minutes
Ingredients
- 250 g ricotta, drained if wet
- 20 g finely grated Parmesan
- 10 g olive oil
- ½ tsp finely grated zest of a well-washed lemon, yellow part only
- 2–3 grinds of black pepper
- 0–1 g fine salt, only after adding the Parmesan
Method
- Mix the ricotta, Parmesan, oil, lemon zest and pepper. Taste before adding any salt.
- If too stiff to spread, stir in water 1 tsp at a time. Aim for a spreadable cream, not a runny sauce.
- Use 40–50 g per pizza, spread thinly or in small, shallow dollops. Top lightly and bake.
Pairs well with: Blanched spinach squeezed dry, courgette, ham or mushrooms. Also good with rocket added after baking.
Allergen: milk. The lemon should just add a little freshness. This is our white cheese spread, rather than a standard recipe for pizza bianca.
White 3: Mild béchamel with Parmesan
Open recipe and adjust quantity →
About 280–300 g · 5–6 pizzas · 15 minutes + cooling
Ingredients
- 20 g butter, or 15 g olive oil
- 20 g plain wheat flour
- 250 g milk
- 20 g finely grated Parmesan
- 1 g fine salt, adjust after adding the cheese
- 1 small pinch grated nutmeg and a little black pepper
Method
- Melt the butter over a medium-low heat, or warm the oil. Whisk in the flour and cook gently for 1–2 minutes without browning.
- Gradually whisk in the milk. Simmer for 5–8 minutes, stirring, until smooth and the flour is cooked through.
- Remove from the heat and stir in the Parmesan. Season with salt, nutmeg and pepper. Cool before use.
- Use 40–60 g per pizza, particularly in a home oven or on pan pizza. If the cold sauce is too thick, stir in a little milk until it spreads thinly.
Pairs well with: Fully cooked chicken, blanched and drained broccoli, ham or browned mushrooms. Be moderate with additional cheese.
Allergens: milk and wheat/gluten. A rich white sauce for home cooking; a thick layer can make the pizza heavy and damp.
One foundation, several directions.
Let the dough rise slowly if you like, but adapt the recipe to the pizza style. Neapolitan pizza, cracker-crisp tavern crust and Chicago stuffed have different requirements. The table below suggests things to try next. It does not give authentic recipes for every style.
| Goal | Change | Important |
|---|---|---|
| Crisp round pizza in a home oven | Keep 65% water; optionally try 12 g olive oil per 600 g flour. | Oil is an additional 2%. It changes the dough but does not automatically make it New York-style. |
| Airier pan pizza | Gradually increase to 70% water: 420 g per 600 g flour. | Use folds, an oiled pan and a good final rise. More water needs better dough handling. |
| One large tray about 30 × 40 cm | About 700–900 g dough is a useful starting range. | Less dough is thinner, more is thicker. Rest between stretching and bake until the centre is cooked. |
| Neapolitan character | Keep the dough free of oil and sugar and use a very hot pizza oven. | Our 48-hour cold fermentation is not identical to the traditional AVPN process. |
| Detroit, deep-dish and cracker crust | Use a dedicated style-specific recipe after your first basic attempt. | Pan, fat, hydration and baking define the style. St. Louis is often yeast-free and does not fit the same fermentation model. |
Pizza styles – and the places they belong to.
Here you will find familiar pizza styles, local versions and regional traditions. The list cannot cover every bakery and local name. Country and region tell you where a style has ties, though of course it can be made elsewhere too. Search by name, city, region or characteristic.
Neapolitan and Detroit describe structure and baking method, among other things. “Sourdough”, “gluten-free” and “wholegrain” describe dough or ingredients and can cut across styles. Nordic and Brazilian entries below are broad regional traditions, not single technical standards. The home-baking tips are our suggestions for adapting the styles.
40 of 40 styles and regional traditions
Pizza napoletana
Soft round pizza
Thin, soft centre and airy rim. A short bake in a very hot oven.
At home: Use a pizza oven for the most characteristic result.
Napoletana contemporanea / canotto
Modern Neapolitan direction
Often an especially tall, airy rim. Canotto particularly describes the inflated edge.
At home: Dough strength and gentle shaping matter more than high hydration alone.
Pizza a ruota di carro
Large Neapolitan variant
Large diameter, very thin centre, often a less pronounced rim than canotto.
At home: Start with a smaller version that fits your oven.
Pizza romana tonda / scrocchiarella
Thin, crisp round pizza
Uniform, flat, crisp base with a less airy rim.
At home: A useful direction for a home-oven steel or stone.
Pizza in teglia / al taglio
Airy tray pizza
Baked in a tray, often sold in cut-to-order portions by weight. Al taglio describes serving.
At home: An oiled pan and a good final rise are useful starting points.
Pizza alla pala
Elongated hearth pizza
An elongated base transferred on a peel and baked directly on the oven surface.
At home: Shape smaller ovals to fit your baking surface.
Pinsa romana
Modern oval pizza relative
An oval, airy bread made with its own flour blend. Modern pinsa was developed in 2001.
At home: Use a dedicated pinsa formula; an oval shape alone does not make pinsa.
Sfincione palermitano
Thick Sicilian tray pizza
Soft, thick base with onion, tomato and often anchovy, cheese and breadcrumbs.
At home: Well suited to an oiled pan in a domestic oven.
Sfincione di Bagheria
White local sfincione
A thick local version without tomato sauce, with onion and local cheeses.
At home: Treat it as its own topping tradition, not just extra mozzarella.
Pizza al padellino / al tegamino
Small pan pizza
A small round pizza proofed and baked in an oiled metal pan.
At home: Use small oven-safe pans when you make it at home.
Pizza a metro
Elongated sharing pizza
A long pizza for sharing, often with different toppings on each section.
At home: Make a shorter sharing version that fits your oven.
Calzone
Folded baked pizza
Dough is folded around a filling and sealed before baking.
At home: Drain the filling and seal the seam well.
Pizza fritta / montanara
Fried pizza family
Pizza fritta can be filled. Montanara is often a small fried dough disc with toppings.
At home: This requires a separate frying method, rather than a standard oven adaptation.
Panzerotto
Small filled, often fried dough
A smaller enclosed relative of calzone, often with tomato and mozzarella.
At home: Use a dedicated method and a restrained amount of filling.
Pizza bianca romana
Pizza bread with oil and salt
A Roman bakery tradition without tomato and usually without cheese. Eaten plain or filled.
At home: Keep it simple, like bread, and let the dough provide most of the flavour.
New York-style
Thin, foldable slice
Large round pizza with a thin, sturdy base and foldable slices.
At home: Long-fermented dough and thoroughly heated steel are useful foundations.
New Haven apizza
Thin and boldly baked
Thin base, restrained toppings and pronounced colour; also known for clam pie.
At home: Aim for crispness and colour without blackening the whole rim.
Detroit-style
Airy rectangular pan pizza
Thick, airy base and crisp cheese along the pan edge. Tomato sauce is often on top.
At home: Use a suitable metal pan and cheese right to the edges.
Chicago deep-dish
Deep round-pan pizza
A deep pan with cheese and filling beneath a distinct tomato-sauce layer.
At home: Needs its own dough formula and a longer, less intense bake.
Chicago stuffed
Stuffed pizza with a dough lid
An extra thin dough layer over the filling distinguishes it from ordinary deep-dish.
At home: Do not use the baking time for a thin round pizza.
Chicago tavern-style
Thin cracker-like crust
A crisp, thin round pizza usually cut into small squares.
At home: Rolling can be appropriate; a high rim is not the goal.
Sicilian-American
Thick square pizza
A thick, bread-like rectangular pan pizza, distinct from Palermo’s sfincione.
At home: Allow a good final rise in the pan.
Grandma pizza
Thinner rectangular pan pizza
Usually thinner and denser than Sicilian-American, with Italian-American home-kitchen roots.
At home: Use less dough in an oiled tray.
St. Louis-style
Very thin and crisp
Cracker-like crust, square cuts and the local cheese blend Provel.
At home: Often yeast-free; use a separate formula rather than the 48-hour dough.
South Shore bar pizza
Small round pan pizza
Thin base with sauce and cheese to the edge, where it browns thoroughly.
At home: A small metal pan gives better control of the crisp edge.
Buffalo-style
Substantial round pizza
Airy, thicker base, plenty of cheese and often pepperoni that curls into cups.
At home: Make sure the thicker base cooks through before adding more toppings.
Trenton tomato pie
Tomato atop a thin base
A thin round pizza with cheese beneath tomatoes or sauce.
At home: Keep the tomato layer moderate so the base stays crisp.
Old Forge-style
Rectangular tray pizza
Often ordered as trays and cuts. Red and white versions have distinct local forms.
At home: Use a pan and choose one local version as a starting point.
California-style
Ingredients and toppings come first
Creative seasonal toppings, with no single standard for the dough.
At home: Use the basic dough and try one focused ingredient combination.
Greek-style / New England
Round pan pizza
Soft, spongy dough baked in an oiled shallow pan. The name refers to Greek-American pizza culture.
At home: Use a shallow metal pan and let the underside colour well.
Quad Cities-style
Malt-flavoured crust and strip cuts
Known for malt in the dough, crumbled sausage, toppings under the cheese and strip-shaped cuts.
At home: Use a dedicated recipe to reproduce the malt character.
Colorado mountain pie
Substantial rim and generous pizza
A regional style closely associated with Beau Jo’s, with a thick, pronounced rim.
At home: Do not stretch the dough as thinly as a Neapolitan base.
Philadelphia tomato pie
Pizza-adjacent bakery tradition
Bread-like rectangular base with tomato sauce and little or no cheese. Often served at room temperature.
At home: Do not confuse it with Trenton’s thin, round tomato pie.
Windsor-style
Regional Canadian pizza tradition
Known for shredded pepperoni, local mozzarella and a crisp base.
At home: Distribute pepperoni evenly and control moisture.
Pizza al molde
Thick pan pizza
A porteño tradition with a thick, soft base and generous cheese.
At home: Proof in the pan and allow the thick base enough baking time.
Fugazza / fugazzeta
Onion pizza and cheese-filled version
Fugazza puts onion first; fugazzeta combines onion and abundant cheese, often stuffed.
At home: Slice onions evenly and decide on an open or stuffed version first.
Pizza a la parrilla
Grilled pizza
A thin, crisp style cooked on a grill.
At home: Needs control of direct heat and a dedicated grilling method.
Norsk hjemmelaget langpannepizza
Broad home-cooking tradition
Often a softer, thicker base with cheese and generous toppings. There is no shared regional standard.
At home: You can let the dough rise slowly and still get that familiar homemade tray pizza.
Svensk pizzeriapizza
Regional serving and topping tradition
Often large and thin, with a wide range of toppings; kebab pizza is a familiar example.
At home: Keep sauces and cold toppings separate until after baking where appropriate.
Pizza paulistana
Regional Brazilian pizza culture
A major local pizza tradition with many topping combinations, not one universal formula.
At home: Choose a specific local combination and adapt moisture and baking time.
Close relatives with traditions of their own.
Tarte flambée / Flammkuchen from Alsace in France and neighbouring German areas has a very thin base, often with crème fraîche, onion and bacon. Pissaladière from Nice in Provence, France, is an onion-rich tart with anchovy and olives. Both have traditions of their own.
Lahmacun is a thin flatbread with spiced minced meat, known in Türkiye and the eastern Mediterranean region, among other places. Turkish pide is often boat-shaped and filled. Georgian khachapuri is cheese bread with several regional forms. They can inspire pizza night without everything needing to be called pizza.
Focaccia from Liguria and other Italian regions also overlaps with some pizza breads. Compare the dough, shaping and baking. Use the names correctly and respect the food traditions behind them.
Read the dough and adjust your next bake.
The dough springs back
It may be cold or still tight after you shaped the dough balls. Cover and wait 15–20 minutes before trying again. Do not tear it wider.
Dough spreads and tears
Possible causes include overproofing, weak flour, too much water or warm dough. Record time and temperature. Shorten the schedule or reduce yeast next time; adding flour now does not rebuild a broken structure.
Pale, wet underside
Heat the baking surface longer, reduce wet toppings and reassess oven position. The cheese on top can be ready long before a thick base has cooked through.
Burnt base before the top is ready
The surface may be too hot or there may be too much dusting flour underneath. Reduce bottom heat or move the surface; in a pizza oven, balance flame and top heat too.
Pizza sticks to the peel
Use a dry peel, light dusting and little time between shaping and baking. Check sliding before launching. For a leak, gently lift the edge and repair the hole before adding more toppings.
Too yeasty or very sour
Check the scale, temperature and actual time spent warm. More yeast will not give the same flavour as dough that has risen slowly under controlled conditions. Try again with the time and temperature under control, and note the difference.
Sources and further reading
We use AI to help with source research. The kitchen examples, things to try and advice when something goes wrong are our own interpretations of those sources.
- AVPN – Neapolitan tradition and technique ↗
- Ooni – cold-proof pizza dough ↗
- King Arthur Baking – regional pizza styles ↗
- King Arthur Baking – Grandma pizza ↗
- King Arthur Baking – South Shore bar pizza ↗
- Italia.it – Italian pizza types ↗
- Turismo Roma – Roman pizza ↗
- Di Marco – the origins of modern pinsa ↗
- Visit Sicily – sfincione ↗
- Visit Sicily – Bagheria’s white sfincione ↗
- City of Turin – pizza al padellino ↗
- Pizza a Metro – Vico Equense ↗
- Choose Chicago – deep-dish and tavern traditions ↗
- Visit New Haven – apizza ↗
- Visit Detroit – local pizza tradition ↗
- Explore St. Louis – local pizza and Provel ↗
- Visit Buffalo – Buffalo-style ↗
- Visit NEPA – Old Forge ↗
- Tuccillo’s – Trenton tomato pies ↗
- Tourism Windsor Essex – Windsor pizza ↗
- Buenos Aires tourism – pizza types ↗
- São Paulo tourism – pizza culture ↗
- CTvisit – New England Greek pizza ↗
- Visit Quad Cities – local pizza style ↗
- Beau Jo’s – Colorado mountain pie ↗
- Visit Philadelphia – tomato pie ↗
- Ooni – cooked tomato sauce (technique reference; quantities here are Sapidus variants) ↗
- MENY – pizza flour and available varieties ↗
- King Arthur Baking – preparing pizza toppings ↗
- Ooni – light toppings and baking ↗
- Ooni – fig, ricotta and prosciutto ↗